Saturday, 24 March 2012
Healthy (er) carrot cake
Whilst I am generally in favour of eating healthily, 'healthy' cakes don't usually feature on my radar as I would normally have the full-fat, full-flavour version without sweeteners and without cutting down on the taste. However, for a friend's birthday I decided to try out this 'healthier' version of carrot cake as she has been doing really well losing weight and we didn't want to make her feel bad about eating cake! Each month, Good Food magazine makes over a dish to produce a healthier version without cutting back on taste, and this carrot cake had really good reviews.
The cake mixture should contain rapeseed oil, which is considered to be healthier than other varieties, although I didn't have any so I did use vegetable oil. There is a lot of grated carrot, plus orange juice, to keep the cake moist without adding more fat, and some of the flour is replaced with wholemeal four. The icing is also a healthier version, using low fat cream cheese and quark, as well as a small amount of icing sugar and lemon juice.
Whilst I love the full fat version of carrot cake, I would quite happily eat this instead. In fact, I might even choose this over 'normal' carrot cake. The reason for this is that it has so much taste, but it's less rich and therefore easier on the stomach! The cake is delicious - full of flavour and extremely moist. The icing is a bit runny due to not being whisked to death with masses of icing sugar, but this does mean that it isn't over sweet like so many types of icing.
It was also really easy to make and didn't involve fussing around with odd ingredients like some 'healthier' recipes do. I realise I say this often, but this is definitely a make-again cake!
Monday, 12 March 2012
Chocolate sponge cake
I make a lot of chocolate cakes, but I'd be hard pushed to have a favourite recipe. I do like rich, moist, gooey chocolate cakes but a decent chocolate sponge cake is not that easy to find. Well, at least I hadn't found one. However, I tried out a recipe from a cake decorating book my other half had bought me called The essential guide to cake decorating and it is fabulous and has immediately become my favourite chocolate sponge.
The sponge contains buttermilk and I think it might be this which makes all the difference. It is moist without being dense and gooey, holds it shape and isn't too crumbly, and not too sweet, rich, or tasteless. It is an excellent chocolate sponge and I will definitely be using it again. The recipe called for a deep 20cm round tin (at least the quantities I wanted to use fitted into this; the book is actually very helpful and provides ingredients quantities for all different tin sizes) and I didn't have one, so I made it in two 20cm sandwich tins. I baked it at a lower temperature and had to watch the time a little, but it worked brilliantly.
Unfortunately, I did realise when making the cake that although I had enough cocoa powder to make the cake, I didn't have enough to make chocolate buttercream as I had intended. However, I'd been shopping earlier in the evening and had, on a whim, bought the new Cadbury's chocolate Philadelphia as it was on offer and I wanted to see what it is like. On a side note, it is quite nice - not sweet and thick like chocolate spread but more like something you'd imagine on a cheesecake. Anyway, I mixed roughly equal quantities of this and chocolate spread (the non-nutty version) and used this instead. I spread a layer of apricot jam in between the cakes, then the chocolately mixture, and used the Philly/chocolate spread combo all over the outside of the cake. I only used a thin layer, as I also used Dr. Oetker's chocolate ready-to-roll icing to cover the cake. Despite my original slight disappointment at the icing not being more chocolately, I used it as it needed to be used!
In the end, I loved the icing. Maybe it was the combination of cake, spread and fondant or something that was different and it just worked better. In any case, I will be buying both the Cadbury's Philadelphia and the Dr. Oetker chocolate fondant again!
The flowers were made at my cake icing class using flower paste. I cut them out, used a ball tool to shape the petals then left them to dry. After that I coloured the flower paste a little more so it went darker, added this as a centre, then dusted some silver lustre dust over the top.
The cake was a very very belated birthday cake for my friend and we ate a lot of it over a weekend! As I said before though, definitely worth doing this recipe again!
Saturday, 3 March 2012
Sugar roses - first attempt at using the cutter method
For Christmas I was given the International School of Sugarcraft Book 2, and this includes instructions for making sugar roses using cutters (rather than my previous attempts, which involved squishing bits of icing into petal shapes). Unfortunately I had no cutters, so I actually used a knife to cut petal cutter shapes! I wanted to see if I could do it before spending money on cutters. I'm pretty happy with the results, so think I might invest in some cutters now! They took a long time to make (partly due to me doing a bit, then doing nothing for several days/weeks) but here's a rundown of the stages involved.
Stage 1:
Make buds, hook wires onto them.
Stage 2:
Add three small petals to the bud, wrapping them so that they overlap each other.
Stage 3:
Add five slightly larger petals, making sure they all overlap each other.
Stage 4:
Add six even larger petals, again ensuring that each overlaps the previous one.
Stage 5:
Add calyxes and then wrap the wires with florist's tape and ta-da!
Now I just have to think of something to do with them. I think I'll probably wire them all together, either into a bouquet or a long string of roses then use them for something special... just have to think of an occasion now!
Sunday, 26 February 2012
Superbowl cupcakes
I realise that I'm posting this a little late... approximately a month ago would have been good, in preparation for the superbowl. However, I haven't been that organised, so here are my superbowl cupcakes which I made at the beginning of February to celebrate the NFL match.
I never used to even really know anything about NFL, however my other half loves it and after kind of being subjected to it most Sunday evenings last season, I sort of ended up taking an interest in it and actually quite enjoy it now! It's really a pretty good game... anyway, back to the cupcakes!
We were supporting the Patriots, but in the interest of fairness, I made cupcakes for both the Patriots and the Giants. The recipe is for a chocolate cupcake and is from the Dr. Oetker website. I used the icing recipe which is part of it as well. I have to say, I was pleasantly surprised as I don't generally like buttercream that much and this one was really good!
The tricky bit was making the logos.
The Patriots have a complicated logo so this is a simplified version thereof! I was pretty pleased with how they turned out though. I made them out of modelling paste (half normal fondant icing and half flower paste) so that they would dry out a bit and hold their shape.
The Giants logo was a bit easier to recreate, although keeping the letters even was difficult. The colours aren't really quite right, but I think they're okay for some novelty cupcakes which were only to be eaten by me and my other half!
After making two Giants logos and two Patriots logos, enough was enough! I decorated the rest very quickly and simply with, what else, glitter!
Saturday, 18 February 2012
Chocolate dinosaur cake
The beginning of January saw my other half have his birthday and, as he is trying to ignore the fact that he is getting older, a children's birthday cake was in order. I saw a video on YouTube detailing how to make this cake and thought it was cute, so decided to have a go. You can find the video here and there is a link to the paper templates used as well.
I made the Easy Chocolate Cake from BBC Food (which I also used for my cricket pitch cake) and, since neither my other half or I like butter icing particularly, I also made the ganache from the BBC Food recipe - I figured it may as well all be chocolate since it wasn't going to be green!
The thing I disliked about this cake is that due to cutting out various parts, there are bits of cake left over. It wasn't really a problem, we just ate those as well, but they weren't iced and in general I prefer to use as much of the cake as possible. In any case, it was fun to make and disappeared very quickly.
The cake is only one layer high, and with the recipe I used this is really enough as the cake is moist and dense, almost like chocolate brownie. Plus it has the chocolate decorations (generic version of Smarties, and you can't really see but there are white chocolate chunks along the back of the dinosaur) for the ultimate chocolatey experience!
Tuesday, 14 February 2012
A little Valentine's day baking...
I'm not really a Valentine's day fan - I have no problem with it and think it's quite cute really, but the red/pink/teddy/heart gifts are all a little bit over the top for me. I think it's nice to celebrate it a little though, and it is definitely a good excuse to bake a cake!
For a while now I have been wanting to try out a recipe I found in Good Food magazine for the Ultimate Chocolate Cake. I have been resisting, waiting for a special occasion, as there is a reason this is the ultimate - 400g sugar, 200g butter, 200g chocolate and that's before you get to the icing! However, the time had come and, in addition, I wanted to try out my heart-shaped springform tin which I have actually had for ages but hadn't yet used.
You can find the recipe here on the Good Food website if you want to try this yourself.
The cake is very rich and moist - it's almost a little like chocolate brownie, which perhaps isn't so surprising if you look at the recipe and the quantities of the various ingredients. It made me worry it wasn't cooked through, but I think it's okay! Mine did sink quite a bit which was disappointing - I think I might have opened the over a bit early. It wasn't early according to the time, but I had reduced the temperature on my oven since we have a fan oven and I suspect I shouldn't have turned it down so much. I think I just about managed to hid the dip by filling it with chocolate ganache though!
What do you think of the chocolate fingers around the sides? I quite like them, I just about got the effect I wanted. I had toyed with using whole fingers then putting actual chocolates (truffles, for example) all over the top so it looked like a basket of chocolates but especially with the cake dipping (and me not being able to find chocolates in time!) that didn't happen. I'm quite pleased with the result though.
Definitely one to try again! I think I'll try it in a normal round tin though and see whether this makes a difference. If you're craving chocolate, this is the ideal solution...
Happy Valentine's day!
Saturday, 4 February 2012
A quiet month...
So January was a quiet month on the baking front - I had to ban myself given that we still had Christmas cake and lots of biscuits and chocolate left over from the holidays. I did make some shortbread, as I had butter that needed to be used as well as a stressed team at work! I also made my other half a birthday cake, which I will get round to posting about!
February should be a bit busier on the blogging front, again it's just a case of getting round to it. I have just made some Superbowl cupcakes for tomorrow, so I will be posting about those. In addition, I have been learning to make different types of sugar flowers at my classes so I will blog about those too - bluebells, winter jasmine and snowdrops to come!
Tuesday, 17 January 2012
Christmas cake #2
Not much information needed for this one - essentially it's the same as the last Christmas cake, albeit square! This one has actually turned out to be better cake as it was cooked for a little less time so it's more moist. Unfortunately I don't like the decoration quite so much but never mind!
The ribbon and holly are made out of coloured fondant icing. The ribbon has been covered in red, holographic, edible glitter and I dusted the holly leaves with silver dusting powder. Yum!
Saturday, 10 December 2011
Christmas cake #1
It's nearly Christmas time, and that means time for Christmas baking! I have made two Christmas cakes this year for three reasons: 1) I like baking, 2) I wanted to do lots of cake decorating and 3) everyone in my family loves fruit cake. Christmas cake always goes down well.
I made my cakes back at the end of October as I like giving them time to mature. Normally they stay in the cupboard until about three days before Christmas when I finally get round to marzipanning and icing them, but because part of my cake icing class involved a Christmas project Christmas cake number 1 is now finished.
As usual, I used Delia Smith's recipe from her Complete Cookery Course book, amended like normal to contain the dried fruit I like best! I also omitted the almonds and used fruit juice instead of brandy. Unfortunately I didn't have (or thought I didn't have) any ground mixed spice when making the cake, so I added ginger and nutmeg in its place. I'm not sure what effect this is going to have on the taste, so am curious to taste the cake to find out. I then found out just recently that I did have ground mixed spice after all, it was just hiding at the back of the cupboard! I could have kicked myself for not finding it (I was sure I should have had it since I had obviously made this recipe before!) and am just hoping the cakes taste okay. They smelled good when I unwrapped them to decorate them, so fingers crossed.
I have learned a few tricks for icing the cake now! Any holes in the cake should be plugged with marzipan before putting the layer of marzipan on. In addition, the cake should be placed upside down on the cake board and if the bottom edge of the cake lies just above the board (due to the way the cake is a bit higher in the middle after cooking) put a long rope of marzipan around the base. Then cover the cake in apricot jam, then marzipan.
Once the marzipan has dried, roll out the icing (I used fondant icing rather than royal icing - I'm not keen on the hard royal icing) and then brush the marzipan with either white alcohol or water. Cover the cake in the icing and smooth. I recently bought a cake smoother and the difference it makes is incredible! This cake is the smoothest I've ever made!
I then left the cake to dry for a few days. I had already started to make some icing penguins using ready to roll fondant icing. Once the heads and bodies were quite dry (I made them separately) I stuck them together using cocktail sticks. I had also previously made some little parcels out of left over icing I had coloured and let them dry out.
So then all that remained was to place all the models on the cake. I put the penguins on first of all, then the presents, but it was still lacking something. Recently I treated myself to a little holly leaf cutter so a friend suggested that I add some holly to the sides. This made it look much more complete!
The final touch was some white, holographic glitter which I sprinkled all over so it looks like snow and frost is sparkling around the penguins.
Now it's just a case of keeping my fingers crossed that it tastes good!
Friday, 9 December 2011
Fairy cakes
I got an urge to do some coloured icing and cake decoration so I made fairy cakes to take to work. It's years since I last properly made fairy cakes (I have to be honest, they're not my favourite!) and it was great fun! I just used a basic Victoria sponge recipe (4oz caster sugar, 4oz margerine, 4oz self raising flour and 2 eggs) and put it into fairy cake cases. I also added some vanilla bean paste to give them a really good vanilla flavour.
The icing is buttercream - the main reason I don't make fairy cakes very often! I am not a fan of buttercream in general, I find it very sweet and not very tasty. However, it is good for decorating fairy cakes and just because I don't like it doesn't mean that other people don't! I think my team at work will eat anything if it's full of sugar!
In any case, I had great fun colouring the icing and then adding glitter and stars! I have to admit, I left a couple of cakes un-iced so that I could enjoy them too!
Not something I can see myself making very often, but if I get the urge to bake something simple just for a bit of icing fun they are perfect!
Thursday, 8 December 2011
Halloween!
There was no way Halloween could go by without a special cake being made! I made a Devils food cake (as I've posted before, it's such an easy recipe and very tasty). This time, I added icing models I had made.
There's not really a lot more to say about this cake - the cake has been mentioned plenty of times already in other posts. It was yummy, as usual, and the little models were great fun to make :).
Sugar primroses
I have just realised how long ago I last wrote a blog post. I have a backlog of baking to post about now! I may as well get started anyway!
At the cake icing class I've been going to we learned to make sugar primroses. These took a very long time - each flower head needs to be cut out using a primrose cutter, frilled using a cocktail stick (this is when you roll a cocktail stick along the edges of the petals to thin them and make them a bit frilly), bent into shape and attached to a wire. The flowers need to be left to dry (this doesn't take very long if they are made using flower paste). Once you have lots of flowers, each has to be wrapped with florist tape and then eventually all taped together. So they took a long time, but for a first attempt I was pretty pleased with the result.
I then made a Madeira cake so that I could ice it and use the flowers as decoration. Madeira cake is good for making decorative cakes as it is less crumbly than an ordinary sponge cake. It also has a good vanilla flavour which goes well with the jam and icing used to finish it. Unfortunately I can't remember exactly which recipe I used! I googled Madeira cake and after comparing several, just decided to use one of them! They all seemed very similar so I basically chose the one that had the right quantity for the size of tin which I had.
I sliced the cake in half horizontally and put jam in between the two halves, then covered the outside of the cake in jam as well. I coloured some fondant icing pale yellow and used this to cover the cake. The lines are made by a little wheel tool so they are dotted rather than just lines. I added some glitter to add something extra then added the flowers. This cake (as with a lot of the cakes I make) was taken to work. The flowers, however, I have saved!
Friday, 14 October 2011
Time for a steady hand...
I recently started a cake icing class and last week we had to bring royal icing so that we could learn to pipe with it. We made piping bags from greaseproof paper and then were given a choice of designs to pipe. I chose Hello Kitty, partly because she's cute but mostly because it looked like the easiest option. I'm not one to turn down a challenge, but having never tried piping before, and having a slightly shaky hand whenever it should really stay still, even the easiest option was going to be a challenge!
We put the designs on top of a tile or cake board then put a piece of microwavable plastic on top (microwavable meaning it is food safe and thicker than cling film, rather than that it was going to go in the microwave). After that it was time to pipe away. The first job is to pipe the outline and then let it dry. After that, the icing should be watered down slightly and then you 'flood' the different sections of the design, still using the piping bag.
It took a long time. However, the results were better than anticipated - my hand stayed just steady enough. It was difficult, but not so difficult or disastrous that I won't try it again. And somehow it even survived the rain on the way to the car. Now I just have to decide what to do with it...
Wednesday, 12 October 2011
Epic fail!
As I mentioned in my last post, I was going to bake some cakes to take to work once I got back from my course. Well, I did do this - I baked a carrot cake with cream cheese frosting, and a Devil's food cake. The carrot cake went to work and went down a storm. However, my other half (for whom I'd baked the Devil's food cake to take to work) decided he would actually rather keep the chocolate cake at home and eat it himself. Which he did. Although I did get a few pieces so I can't complain!
Anyway, the cakes turned out wonderfully. The epic fail? I forgot to take photos. So this doesn't really make a very interesting blog post - what good is a cake blog post without a picture of the cakes?! So I apologise. However, I have baked since, so watch this space!
Tuesday, 20 September 2011
Devil's food cake
There has been an extreme lack of blogging recently on my part, partly due to a huge lack of time (and a little laziness) but also due to the extreme lack of baking (also due to a huge lack of time and a little laziness). I'm not really sure why, but things have been really busy. I have been doing more sport which I guess has taken up a few extra evenings, so that might explain it. Anyhow, I'm back, and whilst there might not be too much baking going on in the next couple of weeks (for reasons I'll explain later) I have more baking plans now!
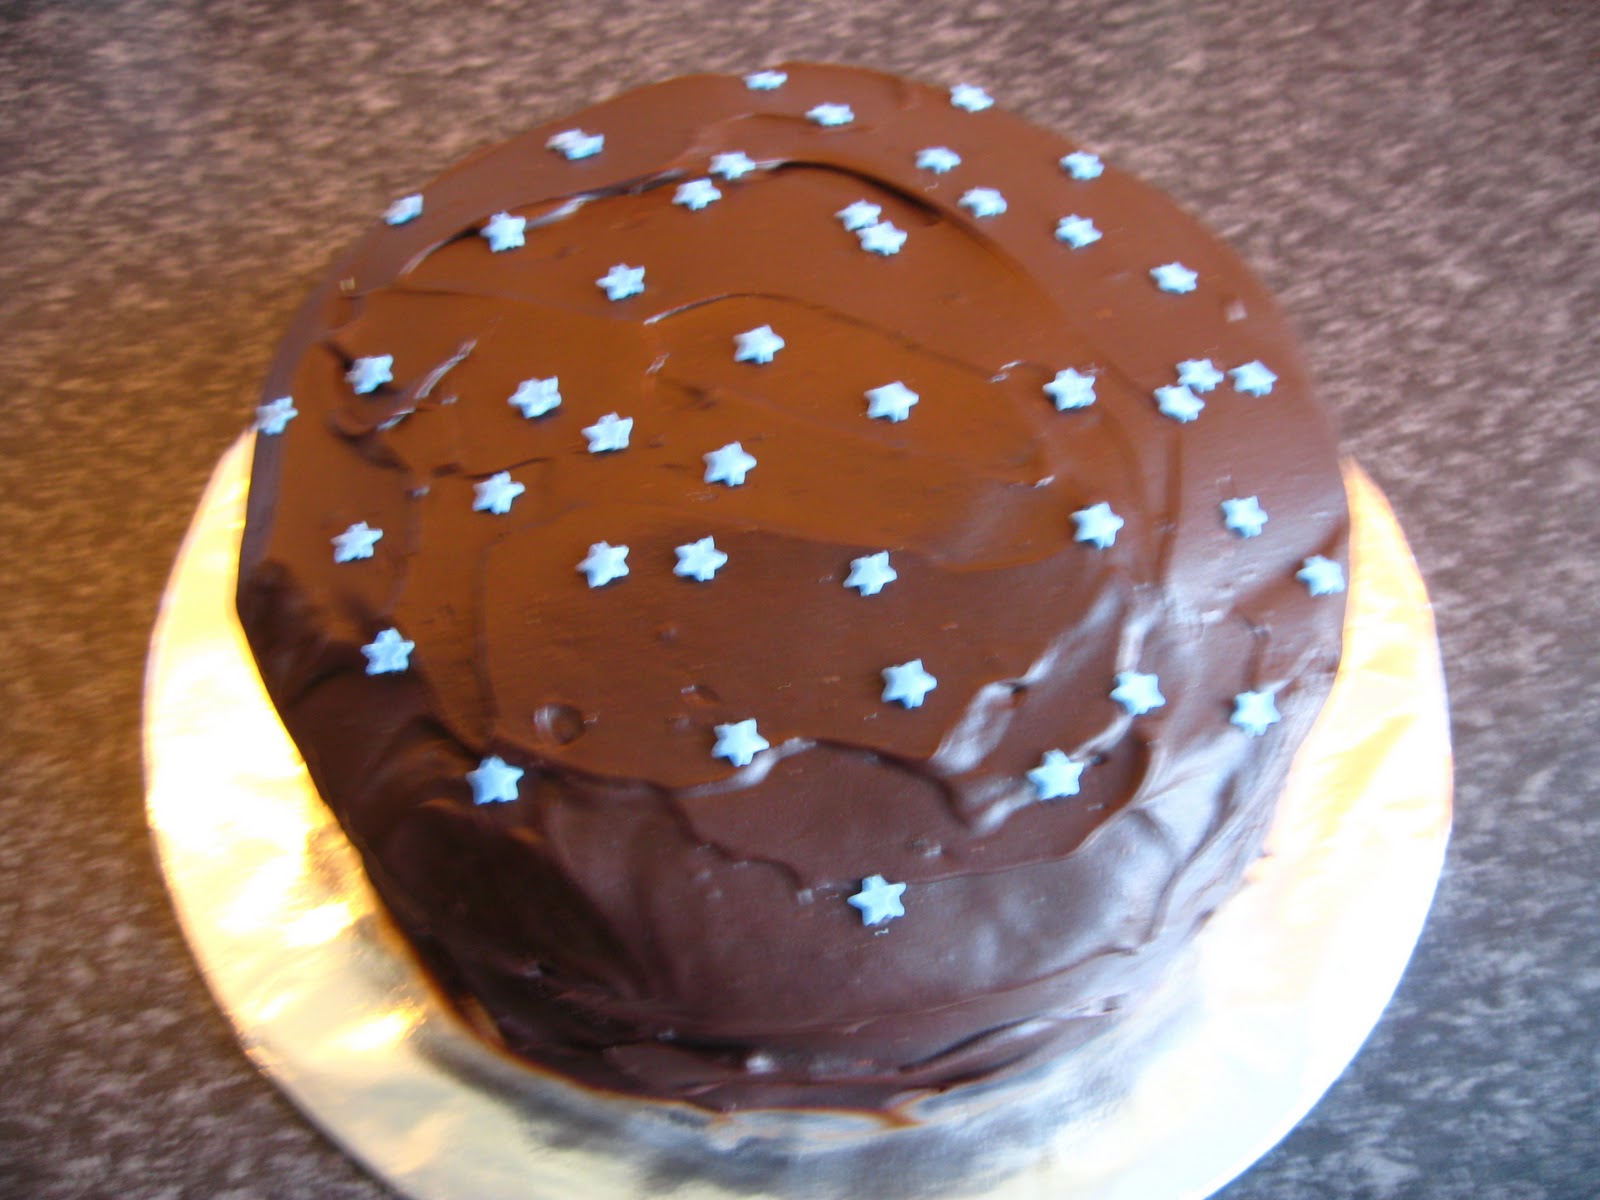
So a while back, I made a Devil's food cake. I had found the recipe previously and wanted to give it a go, and at some point I found I had a bit of spare time and felt that a cake would go down quite nicely. The recipe is one of Nigella's and can be found here. It is basically rich, chocolately goodness and is perfect for when chocolate cravings hit.
The cake is lovely and moist, possibly due to the amount of water added to the cake batter. The nice thing is that the ganache is quite bitter, not at all sweet, and so whilst the cake is rich, it is not one of those which leaves you feeling sick at the end (which is what often happens to me if I eat chocolate cake from a coffee shop chain). I only made 2/3 of the quantity of ganache in the recipe, mostly because I only had 200g chocolate, not 300g. However, I found that this was more than enough, and is possibly also another reason that this cake left me feeling satisfied, not ill.
A few weeks later I made another one of these cakes but decorated it more this time. It was a belated birthday celebration cake for my Mum and so I felt that an extra touch was necessary. These stars can be bought in supermarkets or cake supplies shops and against the dark chocolate they look really effective.
I'll definitely be baking another one of these soon, my other half has requested one to take to work!
Due to not having much time this week and to me leaving on Sunday for a course for work, I probably won't get any baking done until the weekend after next. However, after that I have plans!
Thursday, 11 August 2011
Chocolate brownies - maybe even better than my (previous) favourites!
So again, this may not look like much... but this chocolate brownie recipe was amazing! It actually included an icing, but after letting the brownie cool I decided that the icing would probably spoil it. I think it was the right decision as well, as the brownie was delicious just as it was.
The sponge (can you call it 'sponge' if it's brownie?) was gooey and soft, but not too dense or overly rich. This brownie had just the right consistency - gooey and sticky, but a little cakey. The main difference recipe-wise between this and my previous favourite brownies is that this one did not have any chocolate in the batter (just cocoa powder and chocolate chips) and used only caster sugar, instead of a mix of granulated and muscovado sugars. This means that these brownies are less fudgy, but I liked them better as they were less dense and little more cakey (all the time retaining the stickiness and gooey-ness of brownies). The white and milk chocolate chips were the perfect extra.
In the picture above the brownie doesn't look much; as with the last cake I was taking it to work so didn't want to cut it until I got there. The taste more than makes up for it though!
Friday, 8 July 2011
Lemon drizzle cake
Unfortunately this cake is not much to look at, but that's essentially because it is a traybake rather than a cake in the traditional sense. In any case, the taste makes up for its boring look!
I decided to make a lemon drizzle cake as it's my friend Eley's birthday tomorrow, and cake at work on your birthday is a must. I also made some chocolate brownies (new recipe, post to follow!) as Laura who we also work with celebrates her birthday this weekend too, and I wanted to make sure there was enough to go around. I knew Eley likes lemon drizzle cake but as it turned out, this is also Laura's favourite cake so it was a good choice all round!
The recipe was one I'd found in Good Food magazine a while ago and kept as it looked a) simple and b) yummy. My judgement was right on both counts! The recipe is a simple cake, full of lemon zest for flavour (butter, sugar, SR flour, milk, baking powder, eggs and lemon zest) and to make it even tastier, a lemon juice/sugar syrup is poured over the cake whilst it's still warm. It makes the cake moist and gives it a slightly crunchy topping.
This is a definite keeper - yummy, light cake (and dare I say it, a nice change from chocolate!).
Friday, 10 June 2011
Sachertorte - Dad's 60th birthday take 2
So this year my Dad decided to be greedy and have two birthdays. Admittedly it's not every year you turn 60 and it's quite a milestone so really he was entitled to it! Anyway, for his actual birthday I made the fruit cake and we celebrated with my other half and his family, and he decided he wanted a family celebration too for my brother, my brother's girlfriend and my uncle. Plus it was a good excuse for a holiday!
I was asked if I could make a cake and I'm definitely not one to turn down an excuse to bake! I had the perfect cake as well: a Sachertorte. I fell in love with this cake when I lived in Austria and have made it many times since. The recipe is one my family there got from a magazine years ago - the original Sachertorte recipe is top secret. However, this recipe is the best I've ever tasted.
Sachertorte is a chocolate cake with apricot glaze through the middle and under the glaze, and the glaze is a bitter chocolate icing. It is the perfect chocolate cake in my opinion: not at all sweet, very chocolatey and a very balanced flavour. The cake is not too heavy, but at the same time it's dense enough that every bite of cake contains a lot of flavour. It uses plain flour and no baking powder; instead it is the eggs which cause it to rise (it uses six and the whites are whisked separately to make snow)
I have to admit to using ready-made Sachertorte glaze, bought in Austria, rather than making my own. It's so good that I haven't dared try making my own, although now that my supply has run out, I might have to start doing so soon however as I haven't got any trips to Vienna in the pipeline at the moment! The only bit I wasn't very happy with was the writing - I used a white chocolate icing pen and if you leave it for any amount of time, it seeps and widens - it does not hold its shape at all. Next time I'll try making royal icing and piping it on.
This is my favouritest chocolate cake in the world! It disappeared very quickly (my brother would have licked the cake plate clean if I had allowed him to!) and my Dad enjoyed his second 60th birthday!
Sunday, 5 June 2011
The best cookies ever!
Now these cookies might not look anything special, but believe me when I say that they are the best cookies ever! The recipe is based on one from The First Time Cook by Sophie Grigson (the same book that my extremely chocolatey brownies recipe came from). It is another really simple recipe, and the beauty is that you can add whatever you like to the cookie mix. I think the original recipe is for cookies with pecans and dried apricots, but I used chocolate chips. I've also made them with Smarties before and I think those were even better! The basic recipe, however, is the best cookie recipe I've come across.
The cookie dough is simple: butter (I used margarine), sugar, self-raising flour, milk and then whatever you want to add. They bake in 10-14 minutes, and the end result is soft, chewy cookies - exactly how I like them! They keep well for a few days in an airtight container, but the chances of keeping them that long are pretty slim - I can guarantee that given a chance, people will snap up these cookies!
I'm going to try them with cocoa powder in next to see whether I can make good chocolate cookies from the same recipe. Watch this space for the answer!
You can also find the original recipe here.
Saturday, 4 June 2011
Vanilla sponge cake
I'm still catching up on blogging about the baking that I've done over the past couple of weeks, but I'm getting round to it! This is going to be a short post as there's not really a huge amount to say about it. I made a vanilla sponge cake for my other half's cricket match, using the Hummingbird bakery's Cake Days vanilla cupcake recipe. A note on the recipe advised doubling it to make a three tier cake, but thinking that three tiers would be a bit much, I decided to stick to the quantities given for cupcakes. It turned out that this was a very good decision as the cake was the perfect height (this was using two 20cm cake tins).
I adapted the recipe slightly as I used vanilla bean paste instead of vanilla extract - having procured some recently, I wanted to see how much difference it would make.
The answer is that it makes quite a lot of difference. The sponge had a much fuller vanilla flavour. Added to that was vanilla buttercream icing, again made using the vanilla bean paste. That was all topped off with strawberry jam and the result was a lovely, moist, light sponge with lots of flavour. I have to admit that vanilla sponge is not really my thing, nor is buttercream, and I wouldn't have chosen it for myself, but the combination of flavours did work very well.
If you want a simple but impressive cake, this one certainly fits the bill. It is a little sweet, but for those who like their cake that way this is sure to go down a treat! It looks a little plain on top, but I'm always stuck for what to do with vanilla sponge cakes. Any suggestions welcome!
Subscribe to:
Posts (Atom)